You will notice clickable ellipses in the text. Those are footnotes. They look quite different in the actual post compared to what you see in the preview when you write a post.
I’ve just switched to using Klipper firmware for print processing. Essentially it offloads processing from your printer motherboard to an actual computer. A pi4b in my particular case. I got off to an easy[1] start using the MainsailOS image, which is essentially Raspberry Pi Lite OS with Klipper, Moonraker and Mainsail web interface preinstalled. There are other web interfaces that can be used, like OctoPi or Fluidd and some others, but this was the simplest way to get going and so far I like Mainsail.
Since I didn’t want to relocate my Pi from my network cabinet[2], I ordered a 5m long micro USB cable[3].
I also found a github repo with Klipper configs for my printer that made it much easier to get things up and running, although I had to research and make modifications due to using an LGX Lite Arrow direct drive extruder and a MicroSwiss hot end. Not that the particular hot end matters in the config really.
While setting up your slicer is fairly well covered in the various docs[4], I found a recent Alpha of PrusaSlicer[5] that added direct support for Klipper.
Instead of setting your g-code flavour to Marlin and making other configuration adjustments, you can just set the flavour directly to Klipper without making any further configration adjustments - apart from what Klipper/Mainsail requires for your start and end g-codes. The only problem I had was that when setting the print host to Klipper/Mainsail, the software would immediately crash if trying to test the connection, or ignoring the test, it would just sit forever trying to upload the print. The solution is to use the OctoPi setting for the print host, it just works.
My first actual print with Klipper was to do the resonance tower calibration. Essentially you set the printer to maximum speed and print out the tower. You can determine the resonance frequency and the add compensations for it in the printer config.
Here is the x-axis of the tower. You can see the ringing is fairly prominent in the top print, while the bottom is the same print with resonance compensation applied. The black marks to the top right of the top print are where I measured and counted the “rings”.[6]
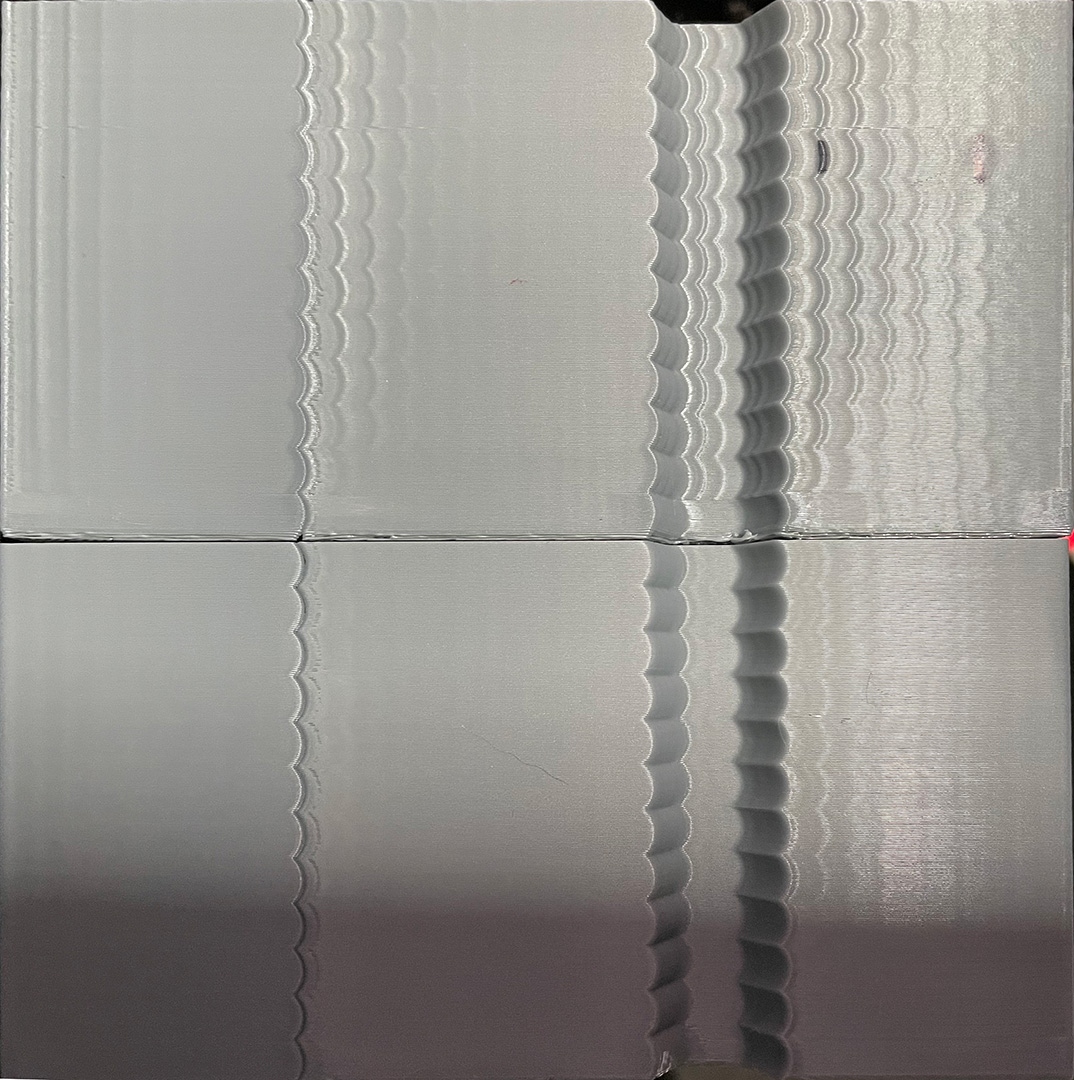
Here is the y-axis of the tower. The ringing is much less pronounced, but it is still there, and pretty much gone in the print with compensation applied.

For what it’s worth, the resonance frequency is considered to be low if you measure a value between 20-25hz. The x-axis measured approximately 21hz, while the y-axis measured approximately 27hz.
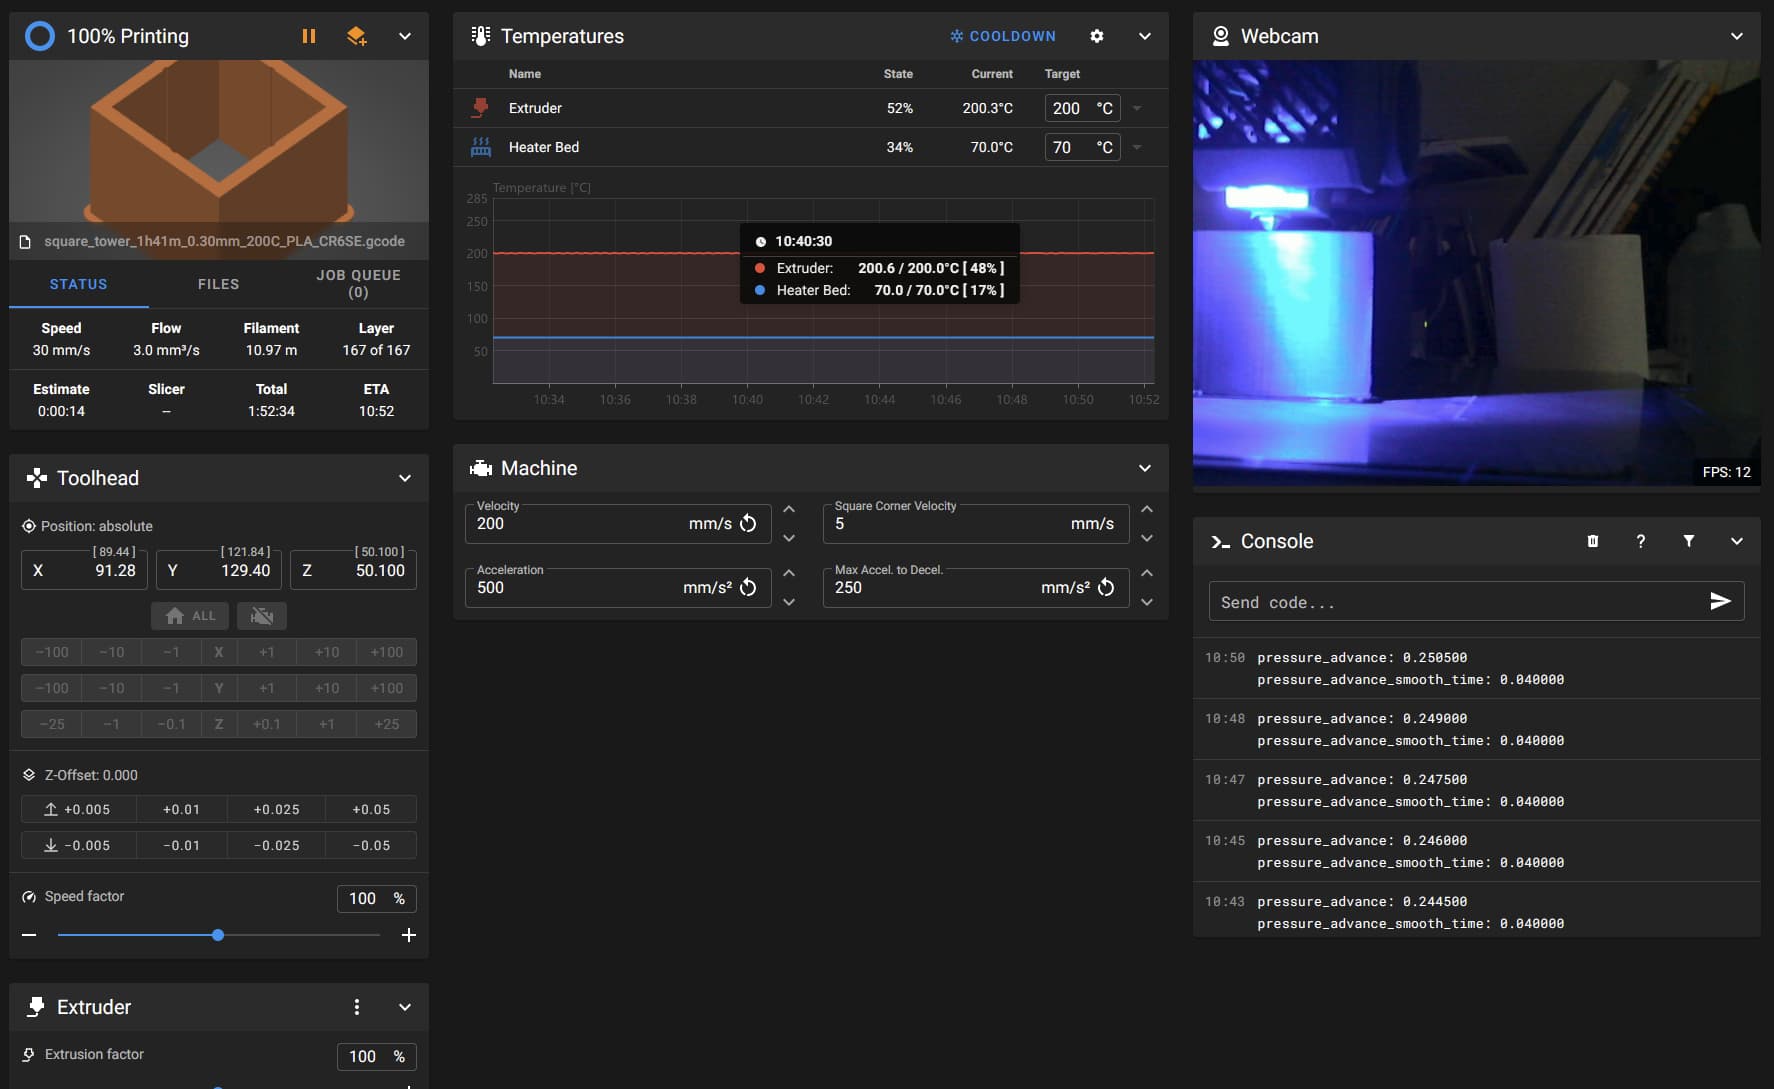
The printer is currently printing the pressure advance tower, and once that is calibrated I should be able to get on with actual prints.
So far I’m very impressed. Also - the slicer print estimates are reasonably accurate now!

As I write this, the pressure advance tower finishes printing.
-
Actually not so easy as I had SSD issues with the Pi, but once that was painfully resolved, the rest was simple. ↩︎
-
My printer lives on the counter below the network cabinet which is mounted on a wall. ↩︎
-
I also printed an insert for the USB-A side to block the +5V pin - Creality printers are notorious for having issues
 with that +5V pin. ↩︎
 -
You need to make g-code adjustments for Klipper as well as for Mainsail. ↩︎
-
My preferred slicer ↩︎
-
Digital calipers are a must-have tool for 3D printing. ↩︎